Table of Content
For the highest bunk, instead of putting mattress up there, I am making it a loft for my son. This will give him some additional space in his room. Little buddy has his own rest room so if we add further sleeping area. His room becomes the most effective answer for a visitor bedroom.
To reduce peel and stick vinyl all you want is an actual knife and a pace sq.. Using a speed square rating it along with your blade. Then merely snap your piece, peel off the backing and stick it up. The next step is to add 2 pocket holes to each end of the rungs.
Step 17- Add Bedding And Decor
For many dad and mom, this fashion of beds offer a greater option to ladders. It supplies them the peace of mind knowing their youngsters are safe when going up and down the steps, especially at night. If you're feeling a bit more confident in your carpentry skills, yow will discover instructions on-line for bunk mattress storage steps.
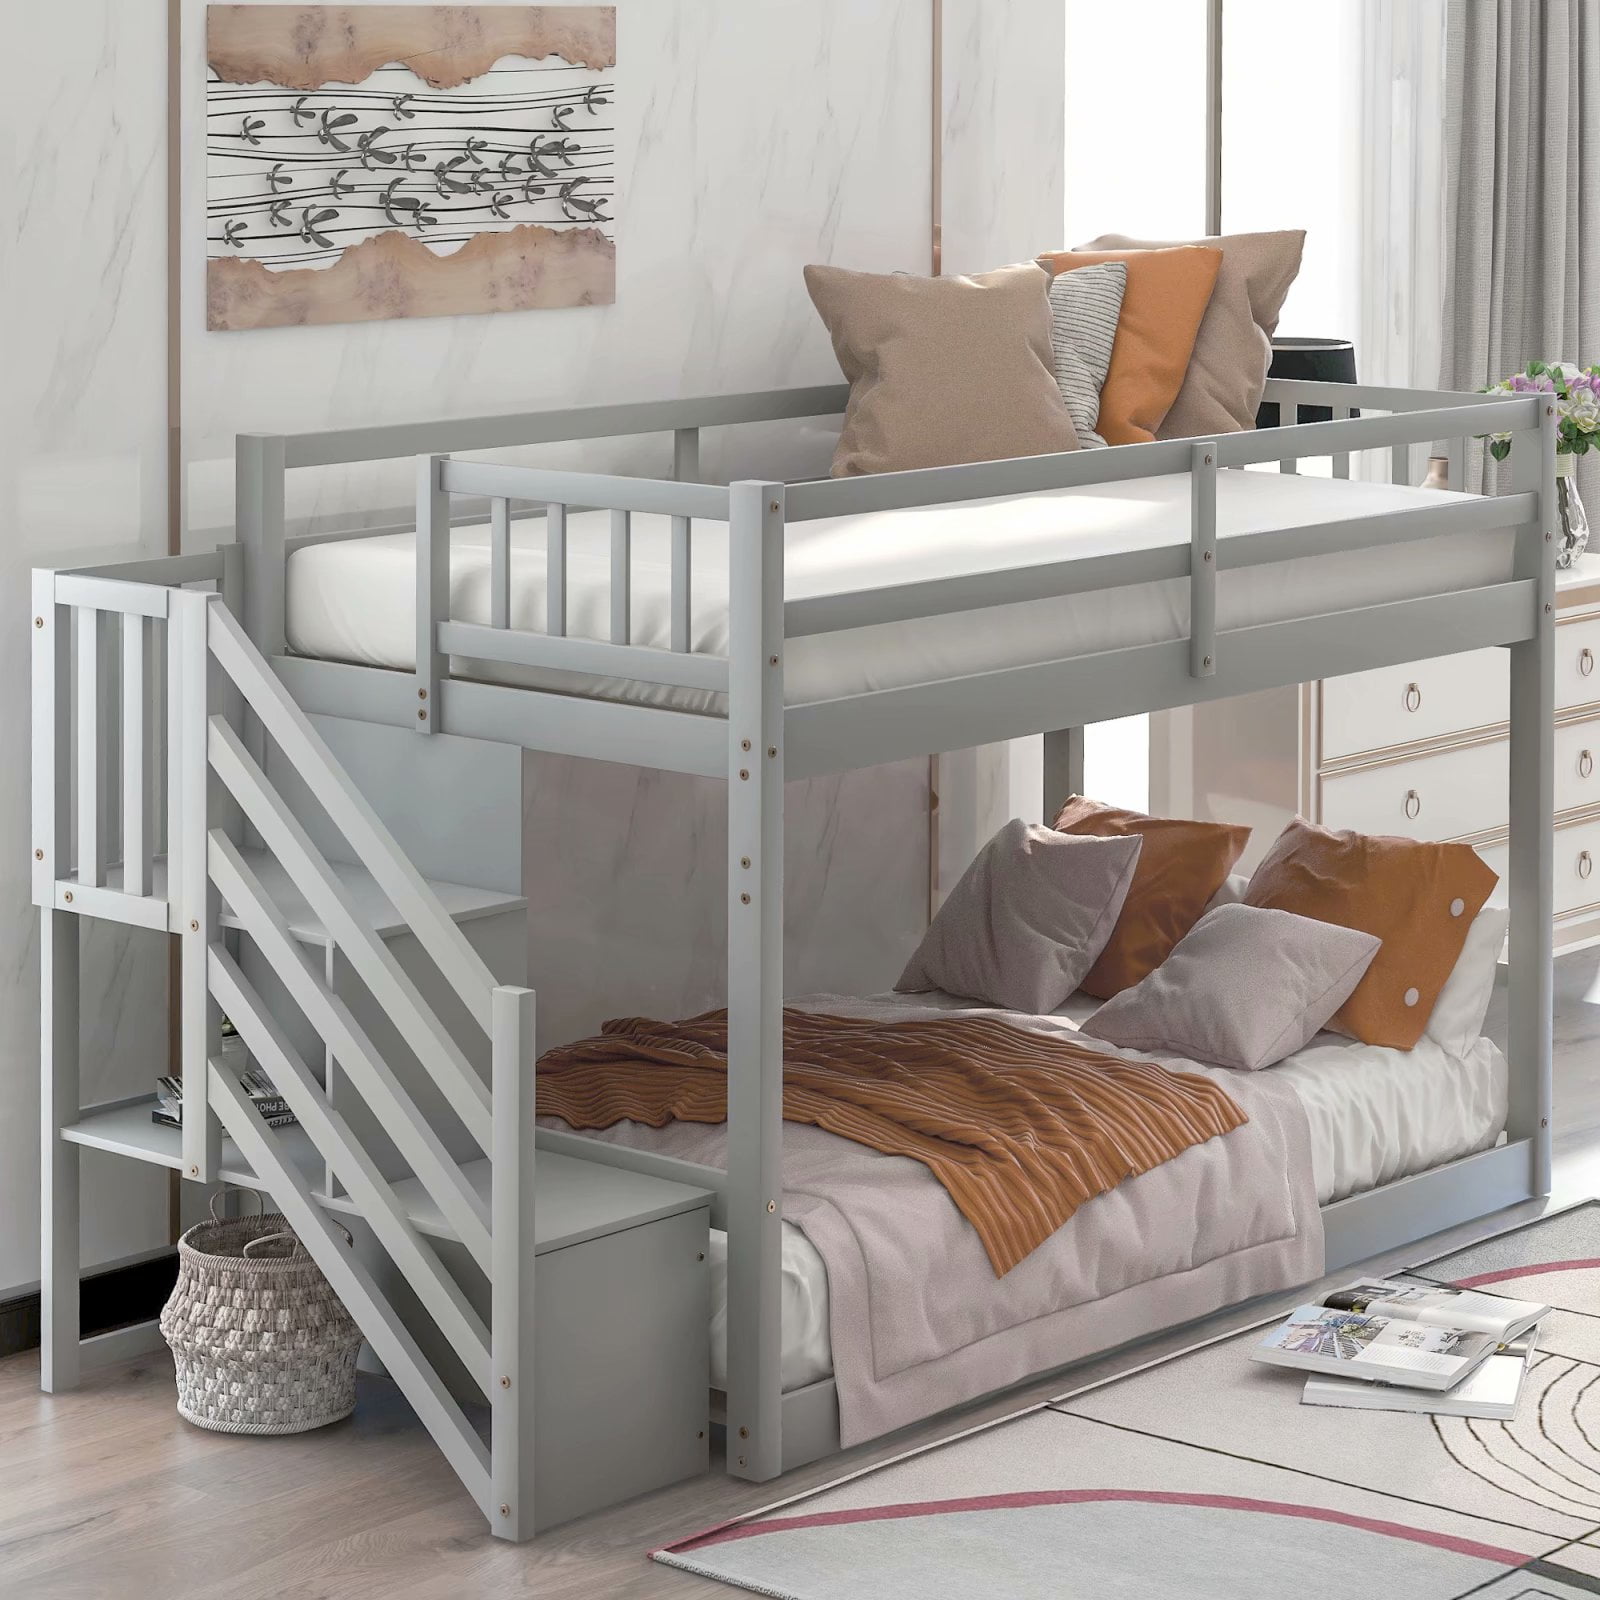
Measure the space between these posts, then subtract three inches (7.6 cm) to account for the aspect rails. An ideal adjusted width is between sixteen and 18 inches .You subtract three inches instead of 4 because 2 x 4 lumber is definitely only 1.5 inches (3.8 cm) thick by three.5 inches (8.9 cm) wide. Our new line of gray and white twin over twin bunk beds with 3 step stairs now give you a more inexpensive resolution if you do not want the in-built drawers. Justbunkbeds carries a large choice of area saving strong wooden bunk beds with stairs that are obtainable in every configuration; corresponding to twin over twin, twin over full and full over full. Kids and oldsters alike love this bed as it offers all the fun and function of a conventional bunk whereas the stairs provide the most secure entry possible to the top.
Step 5 - Construct The Highest Ground
This bed body is movable, which can assist with placement and cleansing down the road. First I began by including a 2x6 alongside the back wall. This 2x6 rests on the 2x4 partitions and is then screwed into the studs on the back wall.

To prep for paint the very first thing I do is vacuum the flooring and moldings to take away the dust. Once everything was all closed in I prepped it for paint. I used Crawford's spackle and a putty knife to fill the nail holes. Once it is dry I will sand the entire further spackle off.
Cut the tops of the aspect rails rigorously along with your noticed. Before slicing the side rails at these upper markings, place them side-by-side to ensure they will be equal in size after cutting. Position and mark them once more if they need fine-tuning, perhaps with the help of a helper this time.

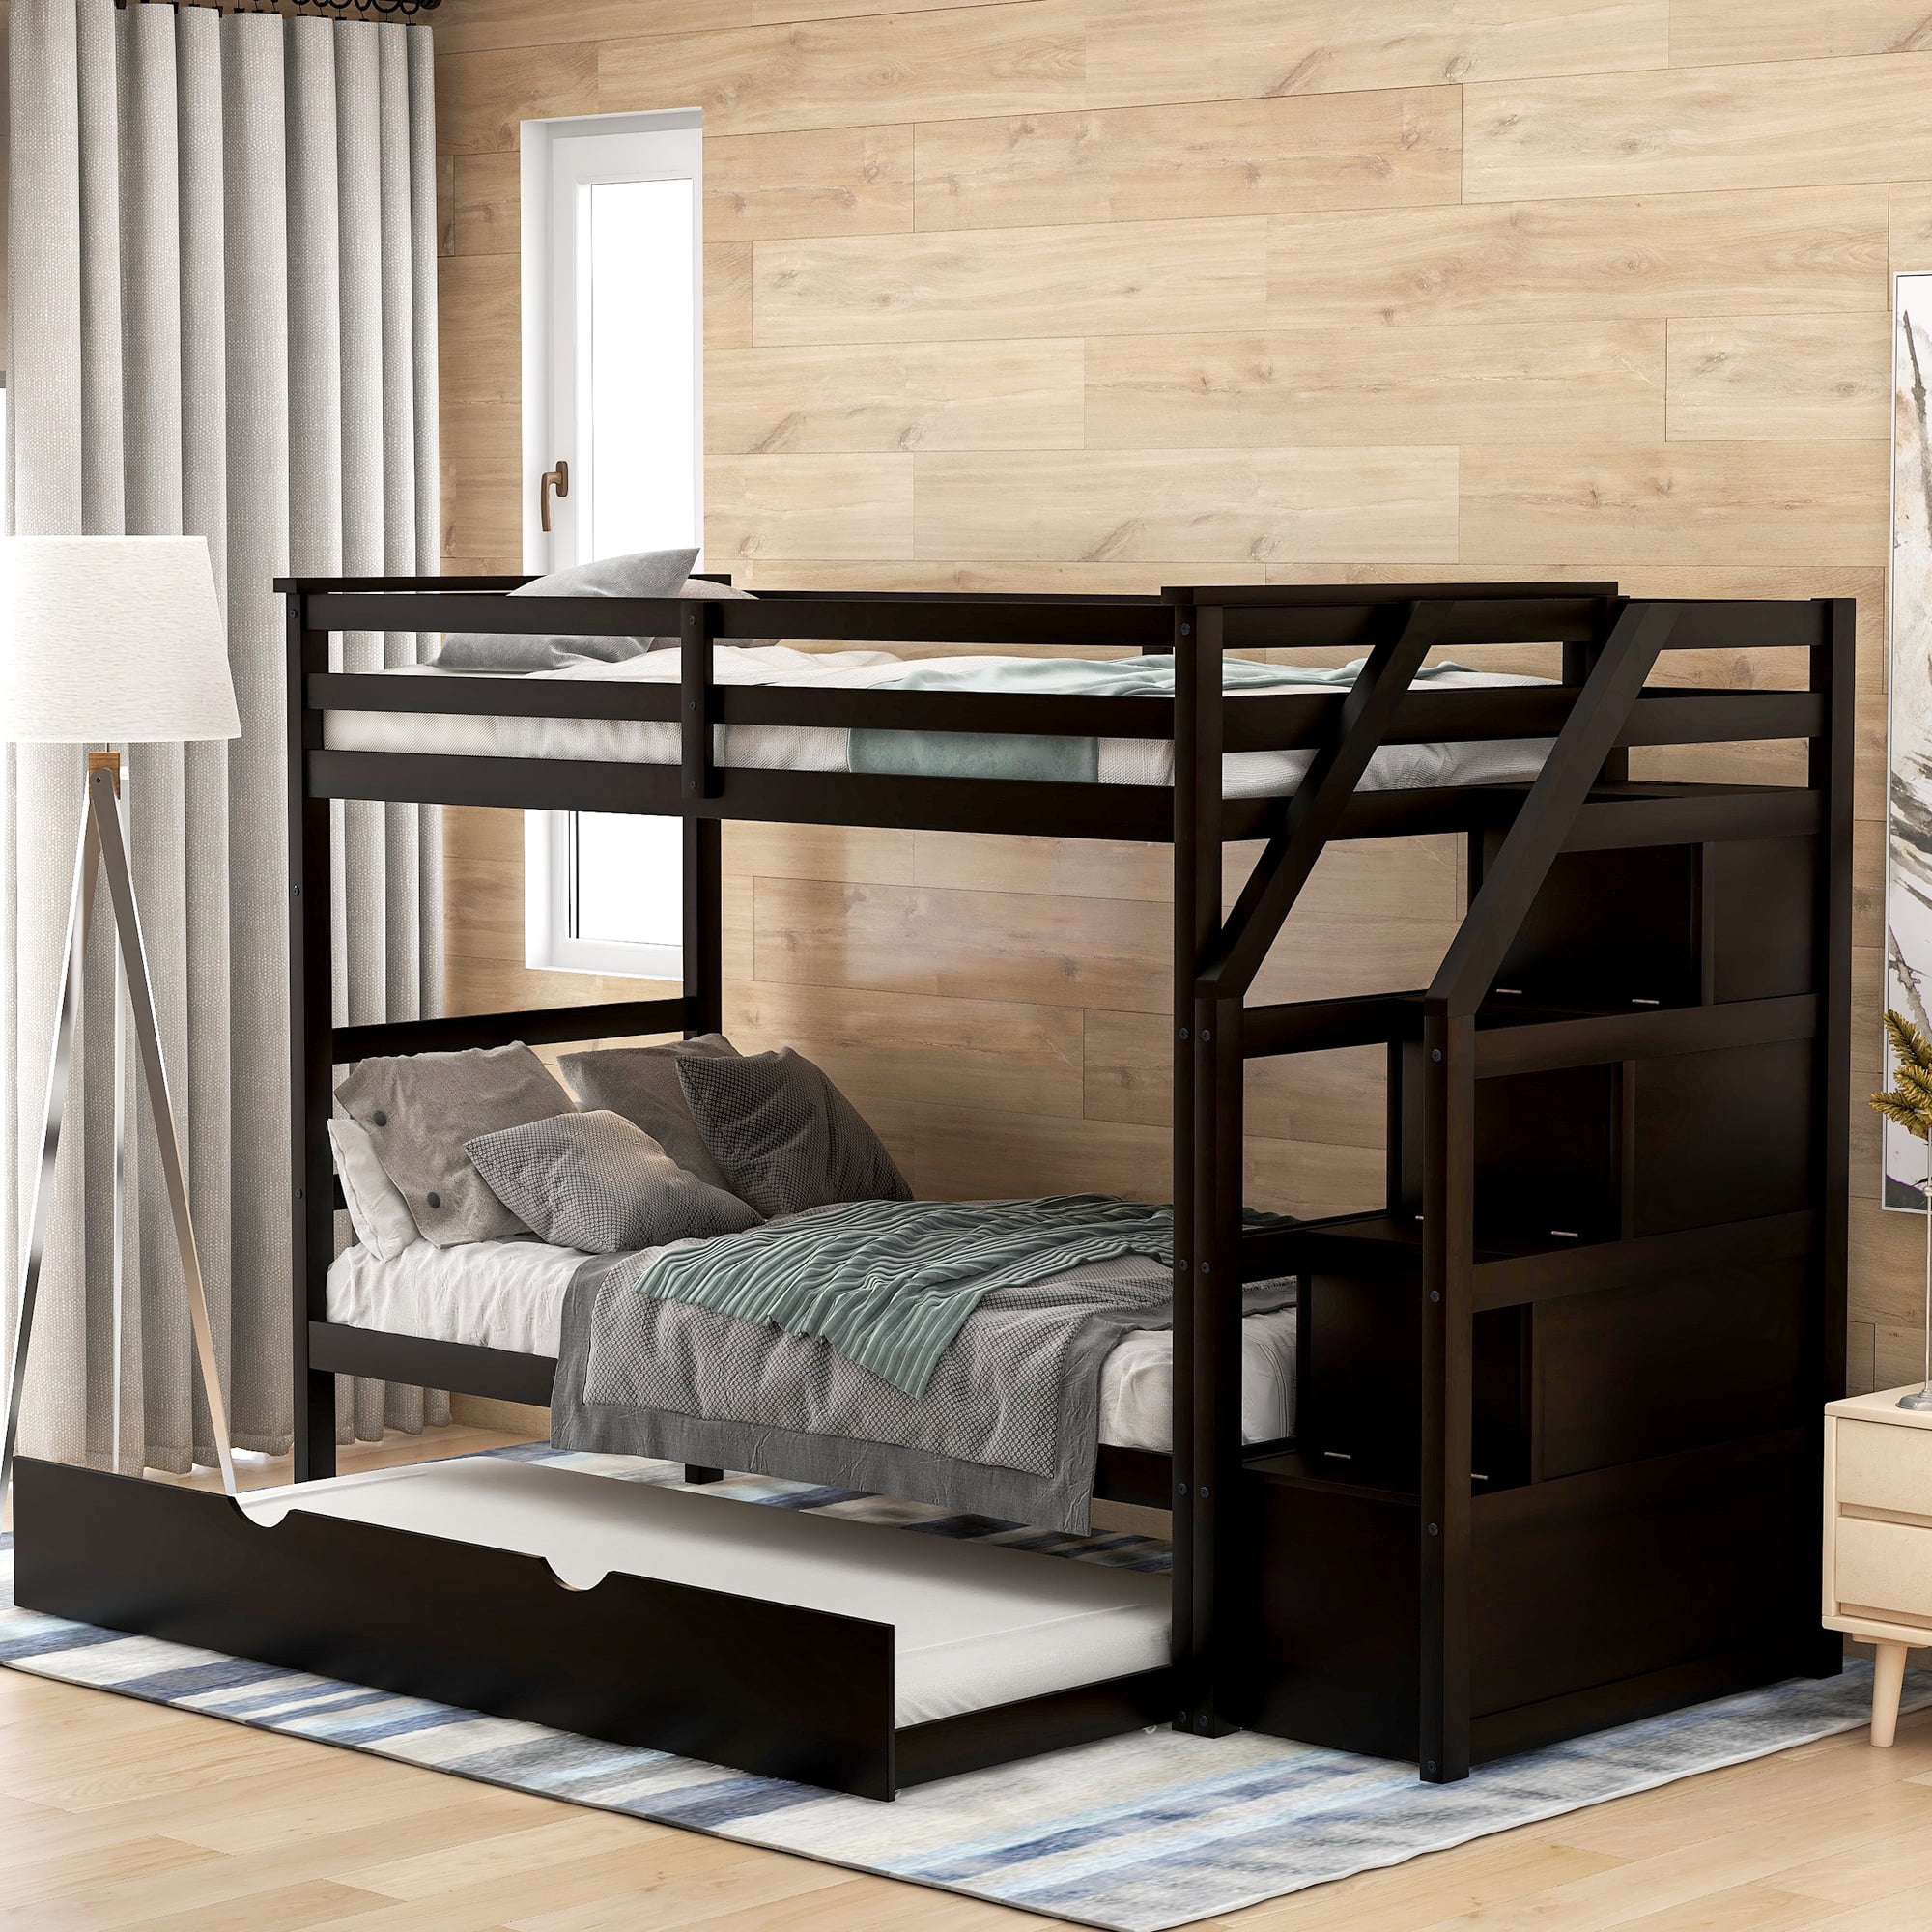
Vertical ladders are straightforward to make however not as protected for youths, and extra substantial staircases could also be past your DIY abilities. Your best choice, then, may be a simple ladder-staircase hybrid you could assemble rapidly out of dimensional lumber. Our most popular bunks are the dual and the twin over a full bunk mattress with stairs come with full-length guardrails to protect our loved ones. For your comfort, they are often upgraded with under-bed storage drawers or trundle to accommodate overnight friends. You can make the most of the trundle for extra storage. Another unique level, generally the bunks are detachable and can be separated into individual beds any time sooner or later.
Step Four - Construct The Partitions For The Diy Bunk Mattress
Anything that's not covered may have paint on it. Do do this run a small bead of caulk alongside the crack. Use your finger and a damp cloth to clean the caulk out and take away an additional caulk. I constructed him some built-in shelves out of 2x6's. I put door hinges on the back of the shelf to create a secret door. This door will swing in, so as soon as closed nobody will know it is there.
For the second a part of the X I did the identical thing. Otherwise the center of the X's will not be line. After the railing was put in I stained it with Providential by Minwax. To find the angle needed I held the 2x4 up the place it needed to be positioned inside the body. I even have been loving the look of X's in railing.
Use 2 x 4 dimensional lumber for the facet rails. A pair of 8 ft (2.4 m) long pieces of good-quality 2 x four dimensional lumber will work properly for this job. Pick by way of the pile at the lumber yard to keep away from pieces that are warped, bowed, or cracked.Check that lumber is straight and “true” by holding one end up to your eyes and searching down the size of the wood. I used my kreg jig to create 6 pocket holes on the outside of the 2x4's. Next, I added glue to the bottom and screwed 2" pocket screws down into the pine shoe. The railing posts are what I will drill my railing into.
You should do away with the sanding mud under all circumstances, but it’s particularly necessary if you plan to stain or paint the wooden. Simply wipe down the floor till you presumably can run your fingers on it with out accumulating mud. You can leave the screw heads exposed if you like, especially when you could wish to take away the ladder-stairs later. If you've a taller than normal mattress, you could need greater than 6 extra treads. Smooth these and all subsequent saw cuts with sandpaper. Use a medium-grit ( grit) sandpaper on all cuts you make during this project.
Move the tread out of the method in which after making the markings.The backside rail rests on the ground so as to provide structural assist. Check out these 17 simple steps to build a DIY twin and queen bunk bed. Some DIYers go all out constructing bunk or loft beds for his or her kids, and they’re often desperate to share their results online. You can find models that look like castles, incorporate sliding boards, and do pretty much anything you presumably can imagine. Mark the tops of the side rails so they’re flush with the bed. Once you’ve placed it in position against its meant vertical assist publish, hint the sting of the vertical support submit onto the side rail so as to cut it flush with the post.
Wood fillers are thick pastes that normally are out there in spherical tubs. Use a small putty knife to use the filler into the depressions created by your screw heads, as well as any knots or imperfections within the wooden. Scrape away the excess filler, as it will make sanding simpler later.Follow the product’s directions for software and drying times. Mark the spacing for the remaining treads on the aspect rails. Along all sides rail, measure the gap from the top of the bottom tread to the highest of the upper bunk’s mattress deck.


No comments:
Post a Comment